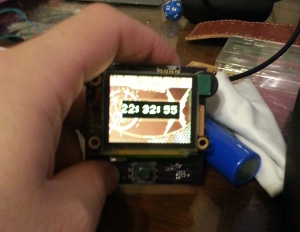
Pipman GPS Watch
Table of Contents

Intro
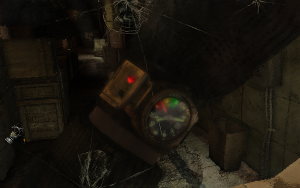
About two and a half years ago my wrist watch was beginning to fall apart. I had worn it for ten years, so this was not surprising. I happened to come across a slashdot article (yes I do still read slashdot every now and then) about watches for techies. Since I was in the market I gave the comments a good read. Some of the coolest features I read about where the ability to automatically set the time themselves, to be solar powered, and to store things like calendar information. I also wanted to have a color screen. At the time, no one had heard of an Apple iWatch or Samsung Gear. Color screens on watches were unheard of. However I could not find any particular watch that did all the things I wanted. I had at the time been playing a video game called Metro 2033 and one of the things that struck out to me was the custom homemade watch the main character used.
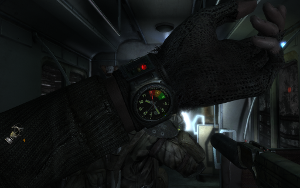
Artyom’s watch had a custom circuit on the side that would tell him how visible he was
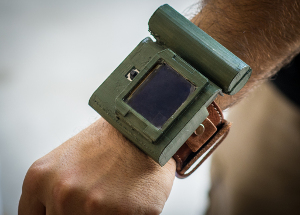
I had no idea if I could actually build my own watch, but I figured it would be a challenge worth trying out (with the added challenge of being able to travel with it without the knuckle draggers at the TSA messing with it). Its been about 2 and half to three years, and I’ve finally finished Mark I. Since its unveiling, its been mentioned on my favorite blog twice. Not all the original features ended up in the final version however (the GPS and color screen would have made solar power impossible). The final version of the project has the following features:
- 1 Gb internal memory (for saving calendar info and saving GPS coordinates)
- GPS (with time syncing abilities, can get local time and date anywhere in the world)
- Tilt Compensated Compass
- Temperature reader
- Color Screen
- Calendar (something I really needed. I am so absent minded I once missed a friends wedding. This incident is what pushed this feature. I wish I was making that up)
- USB support (for importing calendar events and exporting saved GPS markers)
Photo Gallery
Special thanks to Tracy Reindel for the photo work
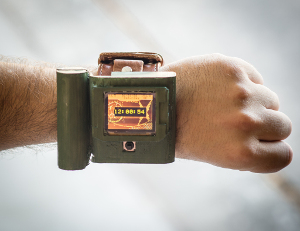
Main screen with date, time, compass heading, and temperature displayed
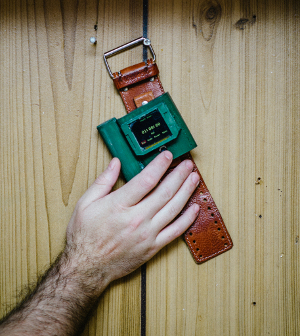
Stop watch and count down page
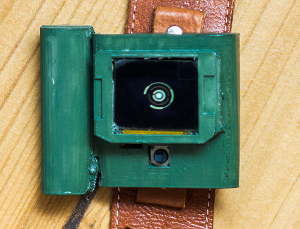
a “spinner” video (shamelessly lifted from Dues Ex) plays to indicate that the watch is trying to get a GPS position fix
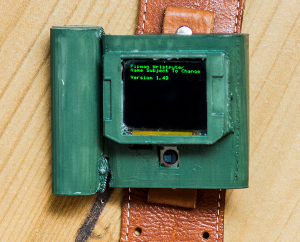
A Fallout and Stien’s Gate reference on the splash screen because reasons
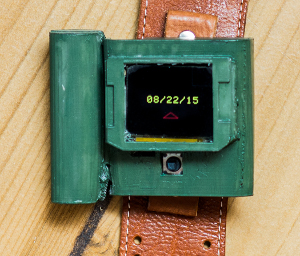
Manually setting the date and time. AKA the I was too impatient to spend 5 minutes to let the watch set itself page
Technical Write Up
I am not a hardware guy by trade, so I had to learn everything here as I went along, such as programming in spin (if python, basic and satan all had a child together, it would have been spin), learning how to use the I2C protocol, proper wiring (not having pull up resistors set me back a while, like 2 months for the compass unit), how to use eagle cad, surface mount soldering and 3D modeling.
Originally I was going to use radio to sync the time, but those parts were getting harder to find and I already had a spare GPS (which receives the time in UTC). At the time I also planned on building a GPS device that would save coordinates from interesting places I had been to (I didn’t own a smart phone then). It made sense to combine these two project ideas since the watch was going to have a GPS anyway.
The Software
The software itself took me a year to write. The final code (boasting 5336 lines) is located on my github under the dbad public license. The main chip I am using is the Propeller by Parallax. The language itself I’m not going to go super in depth with, as most of it is terrible. There are a lot of hackish things that had to be done to get spin to behave the way I intended it to.
One example on why spin is difficult to work with is many times, if you syntactically type something wrong it doesn’t tell you. That’s right, it will compile the code with zero warnings leaving you wondering why things are not working (and no real good way to debug it). For instance, can you tell what is wrong with the leap year detection code below?
  if month== 2 and alreadyCorrected==false
    if cn.isLeapYear(year) ==true
      if day >=29
        if day <> 29
          day:=1
          month:=3
      else
        if day < 1
          day:=31
          month:=1
Have you spotted the error yet? Its this line,
if day >=29if day =>29- All variables must be declared in the function definition. You can’t even create a temporary function variable unless its declared up top first. This is a minor pain to deal with.
- All data types are longs. Strings are longs, ints are longs, floats are longs…might as well have replaced long with var and gone full JavaScript (is my JavaScript hatred showing? Good).
- Passing objects between classes never really worked like you’d expect it to. Lets say you have two classes. those two classes each need to modify variable X. Normally I would pass X to class A, which would do its business, and then have class A pass X to class B. You cannot do this in spin. The moment class B is called, X is null. Why? beats me, but its null every time ಠ_ಠ. Instead, you have to pass X to class A, have class A pass X back to you, and then call class B. This made the code a nightmare in terms of circular dependency issues and general organization.
- Converting data types is way more difficult than it should be. Converting the string “1234” to the integer 1234 is a massive pain. There is no native conversion function (like C’s atoi) nor is there any casting. I had to find a third party script to do it (string helper). Almost all third party libs I found for spin were about as useful as a handbrake on a shark.
The propeller now supports C++, so I would encourage you to use that instead of spin of you want to use the same chip (the chip itself is awesome by the way).
So with all the negative stuff about spin out of the way, what are the good things I can say about the software? Once I got past all the madness with spin I created software that:
- grabs the current time in UTC and its current GPS location from space and looked up where it is on a time zone mapping algorithm I wrote. With that it can accurately set the date/time for your region
- created a driver for the oLED screen for displaying and storing data on its micro sd card (as non of the prebuilt libs I found online worked at all)
- created USB communication between the watch on a desktop computer (to add calendar events and export GPS coordinates. The desktop client software is not yet available as I kind of lost interest in finishing it)
- Basic stop watch and countdown timer
The only other thing that is worth talking about is the storing of GPS data. The screen itself is its own micro controller and has a 1 GB micro SD card for storage. This enables the screen to store images and video files. You can also directly write to it (you address sectors instead of files). I was going to post a screenshot of a hex editor showing some GPS coordinates, but I decided not to post where I used to live to for the world to see.
The Hardware
This project uses:
- 4d systems
oled-128-G1G2 oled display - NEMA GPS. Currently using the GPS-PA6B
- The Honeywell hmc6343 tilt compensated compass (the spark fun breakout board is retired but you can find the chip itself on digikey, and its much cheaper on digikey). If you know how to tweak I2C code it wouldn’t be hard to get any compass module to work
- 5 way switch for navigation
- Propeller micro controller
- TMP102 digital temperature sensor . Which I would skip in all honesty. It does a great job of telling you the board temps, not the air temperature like I intended
- DS1302 Real time clock
- 1 stupidly large battery
- 1 charger / 5 voltage regulator
- 3v regulator
The propeller itself is an awesome beginner chip (as far as hardware goes).
- For $8 you get 8 cores to play with.
- The IDE is cross platform so I dev in Linux
- It now has C++ support
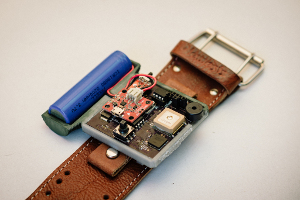
I haven’t had a lot of electronic experience before this project. Everything I’ve ever done is already documented on this site. So by the time I had a “working” prototype done, it looked like this.
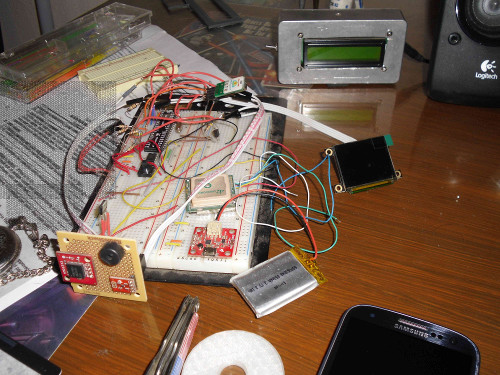
The challenge to wearing all that hardware is to make it not look like this:
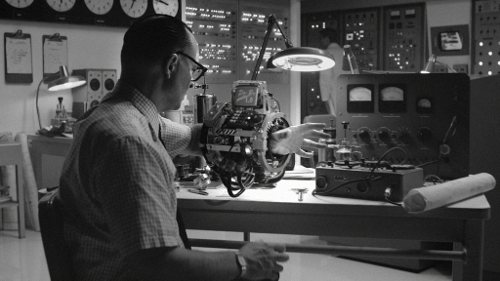
The answer to those questions lied in creating custom circuit boards and learning how to surface mount solder. I met a lot of good people who helped teach me how to do that. First however I needed to learn how to create PCB schematics to build the boards. This process took several months as Eagle Cad is not the most user friendly tool to pick up (but its amazing once you learn it).
After tinkering around with Eagle for a few months, I presented my work to a local tech group I’m apart of. What I had at the time was horribly incorrect. One of the guys who saw my talk came up to me afterwards and basically told me, “Eagle, you’re doing it wrong. Let me show you the right way.” A few weeks later this was the final blue print:


Completed board with cyberdyne logo
The next step was to get the boards milled by a third party. This can get really expensive, but luckily oshpark.com will do it for like $5 a board.
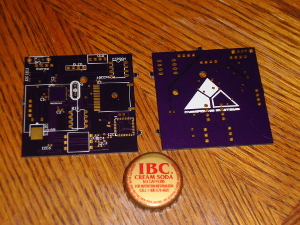
First batch of defect boards
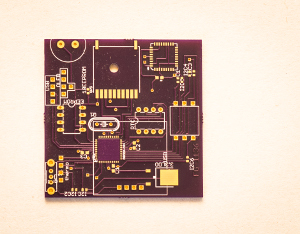
The Final Board
The Schematic and Board files are also available on my github account.
The next step was to use my soldering iron and heat gun to get all those parts on the new board. I spent an entire weekend trying to get that to work. I failed. No matter what I did, the watch never turned on. Eventually assistance as offered by my friend who helped me learn Eagle Cad in the first place. We spent about three hours trying to figure out why the watch would not power up. It turns out, the soldering job I did probably wasn’t to blame (though by that point we had already desoldered most of it and put it together). It turns out I made a mistake in my design of the board. The screen itself communicates to the Propeller with two pins: Rx (receive data) and Tx (transmit data). I had reversed them. The commands I supposed to be sending to the screens Rx pin were going to the Tx pin. I quickly modified the code to swap those pins and it worked like a champ.
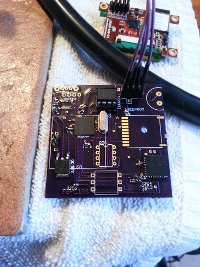
debugging the main board. Using jumper wire we were quickly able to reverse the mistake I made in the design
The Case
The case was designed using Blender, an open source 3d modeling tool (because if you are paying for software, you’re doing it wrong™). Learning how to use blender took me about three months give or take. I’ve been asked before “Why Blender?” That is a fair question. It is mostly used to make 3D movies. Well, Blender is cross platform (I’m trying to remove anything Microsoft in my life) and a lot more flexible than something like google sketch-up. Blender also can export its model’s to STL, the format most 3d printers work with. There isn’t a whole lot else to talk about for the case except for this: buy a pair of digital calipers! I cannot tell you how many “cases” that were wasted after I tried to print them only to find out the dimensions were off by a few milometers. The case files will be on GitHub shortly after I clean up the repository. The case files are also located on my github.
My first goal was to print the case using Bronze filament . However, once I got it to print and not clog (the key was printing it inside with air conditioning), the case weighed like two pounds on its own, and wasn’t quite as strong as the plastic. It is also a massive pain to polish, so I opted to not use it.
And that’s it. If you actually made it this far, that’s awesome. I have plans for a second more socially acceptable version using old calculator bubble displays. While I love this watch, it wouldn’t really work so well when going to a fancy pretentious dinners or swing dancing. It will be a while before I really start on that though.
